Come check it out:
http://sweetcsdesigns.com/archives/606
And don't forget to follow me there to enter to win a bottle bag and Farmer's Market Tote!

Tuesday, May 24, 2011

Monday, May 23, 2011
Don't forget to enter to win a bottle bag and a farmers market tote!
All you need to do is follow my new blog page! Please come on over and check out the new site!
http://www.sweetcsdesigns.com
http://www.sweetcsdesigns.com
Sunday, May 22, 2011
Thank You and Giveaway! All on the new blog- please check it out and bookmark today!
Friends,
My Etsy shop, Sweet C’s, just passed 50 sales! I’ve only been open a few months, and I am so grateful for the support I have received so far!
My Etsy shop, Sweet C’s, just passed 50 sales! I’ve only been open a few months, and I am so grateful for the support I have received so far!
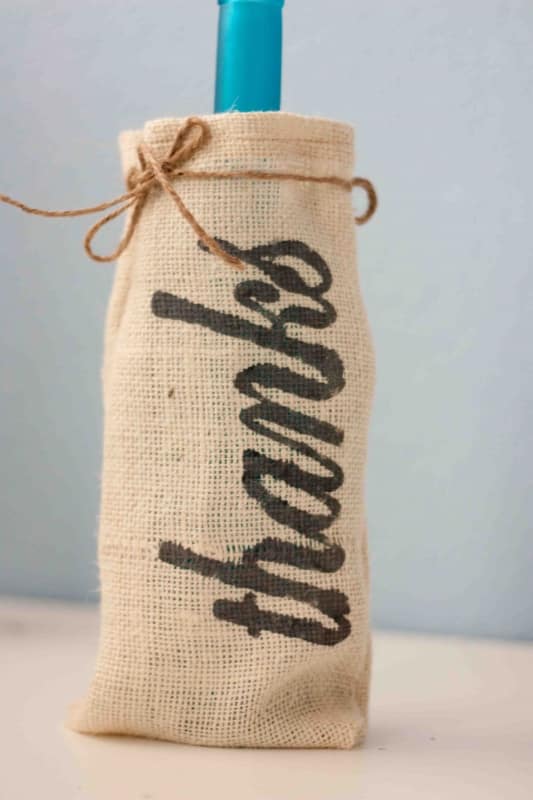
To celebrate, I’m giving away a “thanks” script bottle bag and an adorable burlap farmer’s market bag featuring green and pinks! The bottle bags are perfect hostess gifts- they fit wine, olive oil, balsamic vinegar- and so much more! The farmers market bag is a sturdy little way to carry all of your finds in style, and is also a great substitute for a picnic basket!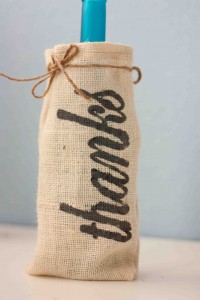


To enter, all you need to do is “follow” my blog at www.sweetcsdesigns.com. Extra entries are awarded for following me on Twitter as well as liking the Sweet C’s Facebook page, and you can get an extra entry each time you refer a friend! *if you already follow my blog, facebook or twitter, you can just leave a comment that you want to win for extra entries!
If you don’t win (or have your eye on something else in the shop) I’m offering a fabulous promotion this week (fri-fri) to celebrate sale #50! Buy one item, get one item (of equal or lesser value) 50% off! To get your discount, please send me a message on Etsy with the two items you would like to purchase, and I will make you a custom listing (so you don’t have to worry about a paypal refund and paying multiple shipping fees).
Saturday, May 14, 2011
Moving on up...
Friends,
I am so thankful for the followers who have watched my site grow since it's infancy early this year. Now that I consider myself in toddlerhood, I decided it was time to switch to wordpress. The seemingly frequent Blogger outages (hey, no body's perfect, and they have a LOT of people they are serving!) have pushed me towards a self hosted site. I hope you will come visit me there and bookmark the new site (redirect coming soon). It is much easier to read, I can do much more with it, and I only have my husband to blame if the server goes down.
I will continue to double post here for a few weeks... but please check out the new digs! I think you will like what you find.
New Address is www.sweetcsdesigns.com - all you have to do is drop the blogspot!
I am so thankful for the followers who have watched my site grow since it's infancy early this year. Now that I consider myself in toddlerhood, I decided it was time to switch to wordpress. The seemingly frequent Blogger outages (hey, no body's perfect, and they have a LOT of people they are serving!) have pushed me towards a self hosted site. I hope you will come visit me there and bookmark the new site (redirect coming soon). It is much easier to read, I can do much more with it, and I only have my husband to blame if the server goes down.
I will continue to double post here for a few weeks... but please check out the new digs! I think you will like what you find.
New Address is www.sweetcsdesigns.com - all you have to do is drop the blogspot!
Wednesday, May 11, 2011
Picnic Party Bunting (with a Sure Cuts a Lot Trace Tutorial)

rainy days make photographing projects harder...
I am a little weird- I am a Coloradoan who loves the rain. Its true- it happens so rarely, I LOVE rainy days. Since having the little guy, however, we've been pretty cooped up inside with an abnormally windy spring. I have been taking full advantage of the beautiful sunny days we have had so far this year and since this weekend's weather calls for sun, I'm going to throw a little "Picnic Party" for us.
We had an old plastic picnic table cover laying around from a past political event, and it's been sitting in my laundry room taking up space. I decided to re purpose it into some great ideas to make our little picnic extra fun- and since all the crafts use one picnic table cover (which we bought for under $3), it is a great inexpensive way to accessorize! While this tutorial focuses on a Cricut cutter and Sure Cuts a Lot software, you can make the banner using the directions I have given below and use pre-cut vinyl or sticker letters (or even just paint the banner) and stickers of ants.
Guest Posting at Inspiredbysarah.com- Felt Love Note Envelopes !
Get ready to get inspired!
One of my friends from high school has started a new blog based on family, marriage, faith and of course some fabulous crafts. I've agreed to post some of my quick crafts there on Wednesdays- please come join me and check out Sarah's wonderful creation!
All this week, Inspiredbysarah.com has a TON of giveaways- including a beautiful burlap bottle bag from the Sweet C's Etsy Shop!
A sneek peek of the craft you can find over there... I made some felt "Love Note Envelopes"! These little cuties are a pretty way to help inspire your children. Place notes in them thanking them for their good work, a note saying how much you appreciate them, a note congratulating them on a big achievement, or just something small that says "I Love You".
 Please come by this morning and check it out! You can find my post here.
One of my friends from high school has started a new blog based on family, marriage, faith and of course some fabulous crafts. I've agreed to post some of my quick crafts there on Wednesdays- please come join me and check out Sarah's wonderful creation!
All this week, Inspiredbysarah.com has a TON of giveaways- including a beautiful burlap bottle bag from the Sweet C's Etsy Shop!
A sneek peek of the craft you can find over there... I made some felt "Love Note Envelopes"! These little cuties are a pretty way to help inspire your children. Place notes in them thanking them for their good work, a note saying how much you appreciate them, a note congratulating them on a big achievement, or just something small that says "I Love You".

Tuesday, May 10, 2011
New in the Market- Pew Flower Cones!

Shown here with a simple burlap ribbon and jute twine to hang, this cone is fully enclosed and an elegant, rustic touch to any space!
Can be customized with your choice of ribbon (black satin would look great with this), or can even have a letter handpainted on the front.
The cone measures 12", but look for additional sizes coming soon! Check them out here!
Friday, May 6, 2011
Naptime Project Button Up Shirt Pillow from Grammie C

The Button Up Shirt madness continues... this time with an easy pillow design from Grammie C!
Button holes are a total pain to make, but I love the way they make a pillow look finished. Today I am going to show you how to make polished pillows with the easiest buttons ever- by using an old button up shirt!
You'll need an old button up shirt, and two 18x18 cuts of fabric (I used burlap, my favorite!)
Cut the button hole and button sides off an old shirt. When cutting add at least a quarter inch. I made an 18 inch pillow so button up the cut out strips and measure 18 inches, cut off excess.

Cut two pieces of your pillow fabric in an 18 x 18 square.

With right sides together, sew the button hole strip to the pillow with a quarter inch seam, press. Attach the button strip front side to the back side of the pillow with a quarter inch seam.


Insert pillow, and you're done!



Thursday, May 5, 2011
Naptime Project- Craft Storage Tub From Grammie C
From "Grammie C" comes this adorable craft storage tub made out of an old oatmeal can:
Don't miss a great giveaway link at the bottom of the post!

Don't miss a great giveaway link at the bottom of the post!
Wednesday, May 4, 2011
Upcycled Button Up Shirt- Welcome Wreath

I'm on a kick of using old button up shirts after we did a "spring cleaning" of our closets- and today I have another really quick and adorable craft you can use your old shirts with.
To begin, you'll need:
-Grapevine wreath (can be found at your craft store for about $3)
-Old button up shirt, cut into long strips 2" wide -Mod Podge
-Wooden cutout of your Last Name's first letter
-Decorative Paper
-Printout of your last name and "welcome" or any other saying
-Hot glue
-Ribbon
Monday, May 2, 2011
Brand New Banners!


Sunday, May 1, 2011
Naptime Project- Upcycled Button-up Shirt Napkin Rings or Candle Cozy

Today's naptime project is a continuation of yesterday's upcycled button-up shirt laundry bag. For this project, we will use the cuffs of the shirt.
First, cut off the cuffs from the sleeve.

Then, use a strip of burlap that is just longer and about 1" wider than the cuff when it is unbuttoned (I used longer burlap and then cut it down, but this isn't necessary).

Next, sew the cuff to the burlap. I tried to stick to stitches already on the cuff. Follow all around the cuff, but DO NOT STITCH END WITH BUTTON HOLES (I learned this one the hard way).


Button the cuff.

Saturday, April 30, 2011
Naptime Project- Upcycled Button Up Shirt Laundry Bag

I saw this idea in a magazine recently, and had to try it out. We have a TON of old button up shirts that don't fit but are too cute to part with (although we do try to give our unworns once a month to Goodwill). This laundry bag takes under 10 minutes to make, and is easily hung in your closet or on a doorknob.
Besides being totally adorable, this bag is perfect for delicates (including stuffed animals) or travel- you can easily add a drawstring by folding the collar down to make a channel, and dump the whole thing in the wash!
First, take an old shirt, and lay flat on the floor. Cut off the sleeves, and then from the top of the shirt, cut a straight line down the body to make the bag straight. If you are using a shirt with stripes, this is very easy- just follow the lines!


Turn the shirt inside out, and sew up both sides. Then sew the bottom. (just like a pillow)
Turn rightside out, and you're done! If you want this to be extra secure, you could sew the front (next to the buttons) together- however I left it so that I can open up the bag easier.
I used a baby clothes hanger, as adult sizes didn't work for this particular bag. This was a women's size L- a Men's XL should be wide enough to fit an adult hanger.

To add a drawstring:
-Run a cord through the top of the collar, pin collar (underneath cord, so there is room for cord to move) and topstitch 3/4" from top of collar.
Don't throw out the sleeves! We have some more ideas coming up!

Thursday, April 28, 2011
Quick and Easy Dinner- Shrimp and Grits (with bacon)

You'll need:
-Quick Grits or organic grits, cooked according to the package directions
-1/2 pound shredded sharp cheddar cheese (more or less to taste)
-dash of milk or cream
-1/2 pound shrimp
-3 slices bacon, cooked slowly until crispy, then crumbled (optional)
-Garlic or garlic powder, and paprika, depending on your preference or what you have on hand
If you have some leftover bacon, this is a one-pot meal, which is perfect for me on a hectic weekday! Total cooking and prep time is under 15 minutes.
Start by cooking grits to the packages directions. The quick grits I used said to place in boiling water, reduce heat to medium-low, and simmer for 5 minutes. After the grits started to thicken up, I added the cheese, crumbled bacon, garlic (although I think garlic powder works best for such a quick recipe in retrospect) and about a tablespoon and a half of smoked spanish paprika (we love paprika here- it can be easily lost in a rich dish like this so I added quite a bit. It helps balance the cheese's flavor). My grits got a little too thick (I like them pretty creamy) so I added a bit of milk to thin them out.

When the grits were almost done, I tossed in the uncooked shrimp. I let them cook for two minutes on the heat, and then took the pan off the heat to cool a bit. The shrimp continue to cook in the piping hot grits- so to avoid overcooked shrimp, either sautee them in the bacon grease (yum) and add them to the top of the grits at the end, or add them into your grits almost before serving. Shrimp should be opaque and pink, not grey, but should not cook very long after the whole body appears pink, or it will be rubbery and sometimes will taste fishy.

Wednesday, April 27, 2011
Naptime Project- Blue Jean Pocket From Grandma C

This adorable (and super quick) project is thanks to my mom, Chris (the other half of Sweet C's whose fabulous original paintings can be found in my Etsy shop ).
If you have an old pair blue jeans laying around you can make a cute little Blue Jean Pocket Pouch for your little ones.
First, when you cut the pocket off, you will note that the back of the pocket is the inside of the jean. You can leave it as it is, or for a more finished look, you can cut off the back and use the pocket as a pattern to cut out a piece of jean to use as the back of the pocket.
With wrong sides together, stitch around the pocket on three sides leaving the top open.
I added a jute handle and cute buttons I found in my local craft store to embellish the front of the pocket. You could leave the front plain, add a patch, a flower, or write your child's name with paint pens.
You could also place a heavy magnet inside and attach the pocket to your refrigerator! These pouches make great storage for crayons, toys, chore cards, and more!
Tuesday, April 26, 2011
Hey, at least the baby and husband are fed!
With the chaos of Easter, and a blessedly high number of wedding orders in my Etsy shop, the posting kind of fell under the laundry pile the last two days. I promise there are some CUTE, CUTE, CUTE projects coming your way this week!
In the meantime, a few pictures of the little man taking in his first Easter- I'm pretty sure his Grandpa (hub's dad) enjoyed hanging out with him more since he is now working on cutting tooth #2. His teething routine seems to be a few days of misery or just plain sluggishness. Here is your warning, bright colored eggs- you have one more year to hide from this little rascal!


In the meantime, a few pictures of the little man taking in his first Easter- I'm pretty sure his Grandpa (hub's dad) enjoyed hanging out with him more since he is now working on cutting tooth #2. His teething routine seems to be a few days of misery or just plain sluggishness. Here is your warning, bright colored eggs- you have one more year to hide from this little rascal!


Monday, April 25, 2011
Farmers Market Season Sale!
I am seriously excited about farmers market season. I love walking up and down the aisles, staring a fresh produce, wonderful art, delicious cheeses, breads and of course, in Colorado- awesome tamales!!!!... I just can't wait!
To help get you in the farmers market mood, all of my farmers market bags are ON SALE this week! Check out my shop to find some awesome bags that will carry around your finds in style.
To help get you in the farmers market mood, all of my farmers market bags are ON SALE this week! Check out my shop to find some awesome bags that will carry around your finds in style.
Sunday, April 24, 2011
Easter Sunday Strata

This Easter Sunday we held a small brunch with my in-laws as a great celebration and way to break our Lenten fast. Since we haven't been eating eggs, dairy, or meat for 40 days (I got a pass as I am nursing) we were eager to tear into some delicious food.
Stratas are one of my favorite things to make for brunches. All of the preparation is done the night before- they just have to cook for one hour the morning you will be serving it. It is eggy, cheesy and decadent- and always gets me TONS of compliments, without much fuss!
Friday, April 22, 2011
Quick Easter Decoration- Christ is Risen! Subway Art

Pascha, or Easter Sunday for the Orthodox, is a fabulous celebration in our church (my husband and I are Orthodox Christians, and we attend a Greek Orthodox Church). Saturday night we host a candlelight Resurrection midnight service that is truly moving, and I am pretty sad I won't be attending this year as Little Man is just too little to tolerate a church service from 11pm-3am! Sometime after midnight, our candles are lit, the church bells ring, and the whole church erupts into song- it's incredibly beautiful and moving.
After the service, the Lenten fast is over- and a bunch of hungry worshipers head to the fellowship hall (or straight home) to feast on the dairy and meat products they have abstained from for the last 40 days (I have had a pass the last two years from full fasting as I was pregnant and nursing). Everyone is joyous- they kiss each others cheeks, share wine and food, and loudly proclaim "Christ is Risen!" to which the person they are greeting will reply "Truly He is Risen!" (in the original greek: "Khristós Anésti!" "Alithós Anésti!")
The Orthodox church isn't only Greek- and neither is this wonderful proclamation. Until Pentecost, the joyous celebration continues in every language. As a newcomer to the Orthodox festivities, I find this part very challenging- because I don't speak anything but English (and Spanglish). I used a list I found online to create this great subway art of numerous translations of "Christ is Risen!" including Russian, Croatian, Georgian, Celtic, Turkish, Coptic, Spanish, French... and many more. These are spelled in the most phonetic way possible for many of the languages, so you might know of different ways to spell them (for instance the Greek could also be "Christos Anesti").
Feel free to download this and print it for your home this Pascha!
If you'd like a higher resolution PDF copy please email me at sweetcsdesigns (at) gmail (dot) com!

Tuesday, April 19, 2011
Taking Better Photos- Why You Need Photo Editing Software

This isn't from iPhoto's black and white setting...
I am constantly trying to learn all that I can about taking better photos and making the ones I'm stuck with more interesting. While I can't change everything, and I can't come anywhere near being an expert, I'd love to share some tips I have come across that have helped me morph my stale boring shots into interesting subjects.
Craftroom Makeover- Super Cute (and easy) "honey do" chalkboard

Chalkboards are sooo in right now- and I have gone chalk paint crazy! I am (eventually) going to debut a bunch of chalk goods to my wedding line in my Etsy shop, but I had to share this awesome little craft with everyone.
Just like every mom I know, I count on my wonderful, awesome, amazing hubby to help me get anything done (it doesnt hurt to butter them up before you ask them to haul trash, right?). I am a very verbal person, and my husband doesn't always (ok hardly ever) listen to what I say. His mantra is always "write a list, write a list"- but I am usually too all over the place to sit down and write out a list. I decided to make a cute little whiteboard to write out his "lists" while I'm sitting in my craftroom. I can look at the list and figure out what I forgot, what I need that day, and what I'm saving for the weekend. I can take a picture with my phone, text it to him, and I'm done! Might not work for you, but it's just my style!
Easy Recipes For Busy Weekdays- Turkey Burgers and Caramelized Onions
I'm submitting facebook posts on the Stay At Home Moms of Etsy Facebook Page all week, and on Tuesdays they share easy recipes for busy weekdays. I had to share this one with the fabulous mamas! This one is courtesy of Jenny Flake of Picky Palate (if you haven't seen her blog, you need to bookmark it ASAP and be ready to droooool over her fun recipes and amazing photography).
Before I get to her recipe, I'd like to add a recipe for a quick and easy little topping for sliders my husband and I can't live without. One of his good friends makes these amazing caramelized onions at tailgates for burgers, breakfast burritos, everything! (After tasting these onions, I know if any of you come to CSU football games you will be hunting us down).
Dave's Onions:
-1 onion
-1-2 tablespoons honey depending on taste
-4 tablespoons butter (it's ok if you're eating it on turkey burgers, right?)
Chop onion in half, then cut thin slices out of each side (I sometimes use a mandoline to slice the onion, which helps them caramelize much faster). Heat half of the butter in the pan (on medium heat), with a couple of turns of the pan of olive oil. Once pan is hot, place onions in and toss lightly to completely cover in olive oil and butter, reduce heat to medium-low, and let cook until slightly brown on one side.
Resist all temptations to "chase" the onions around the pan. Caramelizing onions is all about letting them sit and slowly turn a deep amber color. Once you feel you have a good browning, go ahead and stir the onions and add remaining butter so you can brown the rest. Do not let the onions burn- we are looking for caramel, not charcoal. I like to have a low heat so I can throw them in and forget about them while preparing other parts of the meal, and not have to worry about burning onions.
Once your onions are almost all caramelized, add 1-2 tablespoons honey (I like 2, my husband prefers them slightly less sweet). We will sometimes add an ounce of whiskey (or dry, dry wine) to deglaze the pan. This is entirely up to you- the heat will burn off the alcohol, but it might be too strong a taste for little mouths. Remove from heat and let rest while you finish your slider prep!
And now on to Pick'y Palate's wonderful Turkey Burgers:

Don't these little turkey burger sliders look FANTASTIC?! I love feta and sun dried tomatoes. Hubs and I will be wolfing these down after Easter, and the lenten fast is over, for sure!
Check out the recipe, with a bunch more beautiful photos here!
1 lb ground turkey
1/2 Cup crumbled feta cheese
1/4 Cup sun-dried tomatoes, jarred in olive oil
1/2 Cup fresh baby spinach leaves, chopped
Pinch of Kosher salt, fresh cracked pepper and Lawry’s Garlic Salt with Parsley
Sun-Dried Tomato Mayonnaise
1 Cup mayonnaise
2 Tablespoons sun-dried tomatoes, packed in olive oil, drained
Baby hamburger buns or dinner rolls, split and warmed
2 Cups fresh baby spinach leaves
1. Heat oil into a large skillet over medium heat. Place turkey, feta, sun dried tomato, spinach and seasonings into a mixing bowl. Mix until just combined. Form 1/4 Cup little patty’s and place onto a cookie sheet. Once all are formed, place batches in hot skillet. Cook for 3-4 minutes per side or until golden brown and cooked through.
2. Place mayonnaise and tomatoes into a bowl; mix to combine. Spread over insides of warm rolls. Layer bottom roll with spinach and the burger. Close with top roll and eat
Makes about 12 little sliders
Before I get to her recipe, I'd like to add a recipe for a quick and easy little topping for sliders my husband and I can't live without. One of his good friends makes these amazing caramelized onions at tailgates for burgers, breakfast burritos, everything! (After tasting these onions, I know if any of you come to CSU football games you will be hunting us down).
Dave's Onions:
-1 onion
-1-2 tablespoons honey depending on taste
-4 tablespoons butter (it's ok if you're eating it on turkey burgers, right?)
Chop onion in half, then cut thin slices out of each side (I sometimes use a mandoline to slice the onion, which helps them caramelize much faster). Heat half of the butter in the pan (on medium heat), with a couple of turns of the pan of olive oil. Once pan is hot, place onions in and toss lightly to completely cover in olive oil and butter, reduce heat to medium-low, and let cook until slightly brown on one side.
Resist all temptations to "chase" the onions around the pan. Caramelizing onions is all about letting them sit and slowly turn a deep amber color. Once you feel you have a good browning, go ahead and stir the onions and add remaining butter so you can brown the rest. Do not let the onions burn- we are looking for caramel, not charcoal. I like to have a low heat so I can throw them in and forget about them while preparing other parts of the meal, and not have to worry about burning onions.
Once your onions are almost all caramelized, add 1-2 tablespoons honey (I like 2, my husband prefers them slightly less sweet). We will sometimes add an ounce of whiskey (or dry, dry wine) to deglaze the pan. This is entirely up to you- the heat will burn off the alcohol, but it might be too strong a taste for little mouths. Remove from heat and let rest while you finish your slider prep!
And now on to Pick'y Palate's wonderful Turkey Burgers:

Don't these little turkey burger sliders look FANTASTIC?! I love feta and sun dried tomatoes. Hubs and I will be wolfing these down after Easter, and the lenten fast is over, for sure!
Check out the recipe, with a bunch more beautiful photos here!
Feta Sun-Dried Tomato Turkey Burger Sliders
2 Tablespoons extra virgin olive oil1 lb ground turkey
1/2 Cup crumbled feta cheese
1/4 Cup sun-dried tomatoes, jarred in olive oil
1/2 Cup fresh baby spinach leaves, chopped
Pinch of Kosher salt, fresh cracked pepper and Lawry’s Garlic Salt with Parsley
Sun-Dried Tomato Mayonnaise
1 Cup mayonnaise
2 Tablespoons sun-dried tomatoes, packed in olive oil, drained
Baby hamburger buns or dinner rolls, split and warmed
2 Cups fresh baby spinach leaves
1. Heat oil into a large skillet over medium heat. Place turkey, feta, sun dried tomato, spinach and seasonings into a mixing bowl. Mix until just combined. Form 1/4 Cup little patty’s and place onto a cookie sheet. Once all are formed, place batches in hot skillet. Cook for 3-4 minutes per side or until golden brown and cooked through.
2. Place mayonnaise and tomatoes into a bowl; mix to combine. Spread over insides of warm rolls. Layer bottom roll with spinach and the burger. Close with top roll and eat
Makes about 12 little sliders
Sunday, April 17, 2011
Taking Better Photos- Photo Editing
I have just recently started an affair. Sometimes its wonderful- sweet, reassuring and addictive; and sometimes its a harrowing, bitter mess. Who is my new suitor? Don't worry, it's my husband's DSLR camera. While we had a brief fling on our honeymoon in Scotland (a picture guide coming soon) we hadn't really connected until little man was born. And now that hubs has set me up with photoshop and adobe lightroom... well it's a full-blown romance.
I am going to start compiling some tips on taking better pictures as I come across them. I'm still new to DSLR, and don't pretend to be an expert, but I am enjoying learning all about taking more interesting, clear photos.
The problem? Camera equipment is expensive! We have an entry level DSLR (canon xsi, and we love it), a 20mm (wide angle)lens, a 50mm lens (my go-to, gives the blurry look beyond subjects), a 100mm zoom, and a canon kit lens. With photoshop and lightroom our photography bill is well over $1,500. So how can you get great results on a budget? Is it even possible? Of course!
I found this wonderful post from Made in Lowell on how she transforms photos from a simple point and shoot camera. Yes, you will need photoshop and some working knowledge of it- but if you want great photos, you are going to need a photo editing software. Check out her wonderful tips here!!!!!!
Saturday, April 16, 2011
Naptime Project- Fire Dog Birthday Gift

Supplies you will need:
-Paint
-Cricut Create a Critter Cartridge or pre-cut Dalmatian and firehat (foam or wood would work)
-Sure Cuts a Lot software or font cartridge or pre-cut letters you can trace onto cardstock and cut
-Canvas
-Staple Gun
-Ribbon, jute, or wall hanging wire
If using a cricut, you'll need the following cardstock:
-Red
-Black
-Yellow
-Fun print (I used the large polka dots from Nana's Kids Cardstack)
-Cricut Expression
Friday, April 15, 2011
Where Do I Start? The Basics!
I've always been "creative", but I haven't really tapped into my creative side since I was a kid. I may have painted walls at home, but that was about it. Since I've had a job, my mantra has been "if I have money, I can buy it. Why make it"? Since little man came along, I've changed all of that.
I bookmarked craft blogs. I drooled over Martha Stewart's ideas. I raided the supplies that had been left by my mother who I always put to work when she comes to visit. But I didn't really know where to start, and I was TOTALLY intimidated by all the craft blogs I found. I wanted to do all the things I saw them doing, but I 1) had no clue what they were talking about; or 2) didn't have the budget they seemed to have.
I decided to start this post because I've had a few people ask about my new found "craftiness" and ask not only how to organize, but what they need to get started. I couldn't seem to find this on other sites, so I thought I would start my own.
I always loved getting those "checklists" in girl scouts that laid out plainly what you were going to need, and what was a nice added perk. This first "where do i start" series post will be my own version of a crafting mama's checklist. I am going to list a few tips on not only what you might need, but where you can find it for a good price- what to splurge on, and tools for any budget. Once you've compiled your craft stash, check out my Pegboard Organizer for an awesome way to store it all.
I bookmarked craft blogs. I drooled over Martha Stewart's ideas. I raided the supplies that had been left by my mother who I always put to work when she comes to visit. But I didn't really know where to start, and I was TOTALLY intimidated by all the craft blogs I found. I wanted to do all the things I saw them doing, but I 1) had no clue what they were talking about; or 2) didn't have the budget they seemed to have.
I decided to start this post because I've had a few people ask about my new found "craftiness" and ask not only how to organize, but what they need to get started. I couldn't seem to find this on other sites, so I thought I would start my own.
I always loved getting those "checklists" in girl scouts that laid out plainly what you were going to need, and what was a nice added perk. This first "where do i start" series post will be my own version of a crafting mama's checklist. I am going to list a few tips on not only what you might need, but where you can find it for a good price- what to splurge on, and tools for any budget. Once you've compiled your craft stash, check out my Pegboard Organizer for an awesome way to store it all.
Craftroom Makeover, Part Three- Containing Fabrics

Full disclosure: I'm not proposing anything dramatic here, people... so if you are looking for a groundbreaking post, this one isn't it. I'm hoping this will give you some good practical ideas to get organized WITHOUT spending any money.
Thursday, April 14, 2011
Recipe Roundup: Here's to Hazelnuts! (And Chocolate, Of Course)
When I was pregnant with Little Man, I craved Nutella something fierce (I was ready to divorce my husband when his mom used the rest of one of my Nutella jars for a party we were throwing... oh, hormones!). I ate Nutella almost every day- at least twice a day. Since then, I have backed off my cravings a bit, and have kind of neglected this wonderfully chocolatey treat.
Until this morning. I went Nutella crazy (and no, thankfully I am not pregnant again yet). For breakfast I whipped up some Nutella pancakes (which I devoured too fast to photograph) by just adding a healthy spoonful or two into pancake batter (if you make 1/4 a batch you can make two perfect pancakes when it is just you).
I may or may not have made a pancake sandwich with a little Nutella smeared in between two pancakes... which got me looking (and lusting over) some awesome recipes with my favorite treat. Here's to hazelnuts:
Nutella Crepes From Tidy Mom:

Nutella Stuffed Brioche French Toast from Nook & Pantry:

Gluten Free Nutella Brownies from Going Gluten Free:

Almond Macarons Filled With Nutella from Brown Eyed Baker:
 The only way Nutella can be even better- Almond Paste! When two of my favorites collide....
Until this morning. I went Nutella crazy (and no, thankfully I am not pregnant again yet). For breakfast I whipped up some Nutella pancakes (which I devoured too fast to photograph) by just adding a healthy spoonful or two into pancake batter (if you make 1/4 a batch you can make two perfect pancakes when it is just you).
I may or may not have made a pancake sandwich with a little Nutella smeared in between two pancakes... which got me looking (and lusting over) some awesome recipes with my favorite treat. Here's to hazelnuts:
Nutella Crepes From Tidy Mom:

Nutella Stuffed Brioche French Toast from Nook & Pantry:

Gluten Free Nutella Brownies from Going Gluten Free:

Almond Macarons Filled With Nutella from Brown Eyed Baker:

Ok, now I need to wipe the drool off my keyboard... I can't wait to make some of these after Lent (when then hubs can join in the gorging!).
It's a Gray Day

You can find this little beauty here!
Wednesday, April 13, 2011
A little delay...
I have a lot of great projects I've been working on... but I've been a little behind since the baby is cutting his first teeth today. He's been a little cranky and in need of lots of extra love the last few days. When he's back to his mischievous self I have some really special treats!
Tuesday, April 12, 2011
Fun Learning Tools For Your Little One!
I just had to share a link with everyone to my friend Alison's blog Oopsey Daisy.
Through the magical powers of Facebook (and a recent high school reunion), many friends from my high school have had the wonderful opportunity to reconnect and share in each other's new lives. I've really enjoyed seeing what Alison, in particular, has been doing since the birth of her adorable son with her outstanding blog. In fact, her blog was one of the sites I most admired when deciding I too was going to embark on a crazy trip down the inter-tubes (extra points if you know that political reference).
Outside of some inspiring craft ideas, one of the most amazing features of Alison's blog is her "Mommy School" series. If you have a little one who you are excited to foster a fun learning environment with, you need to check out her packets!
Her newest "Mommy School" packet is titled "E is for Easter"- go download it and use it with your little ones at home before Easter is here!
Through the magical powers of Facebook (and a recent high school reunion), many friends from my high school have had the wonderful opportunity to reconnect and share in each other's new lives. I've really enjoyed seeing what Alison, in particular, has been doing since the birth of her adorable son with her outstanding blog. In fact, her blog was one of the sites I most admired when deciding I too was going to embark on a crazy trip down the inter-tubes (extra points if you know that political reference).
Outside of some inspiring craft ideas, one of the most amazing features of Alison's blog is her "Mommy School" series. If you have a little one who you are excited to foster a fun learning environment with, you need to check out her packets!
Her newest "Mommy School" packet is titled "E is for Easter"- go download it and use it with your little ones at home before Easter is here!
Naptime Project- Super Easy Sugar Scrub Gift
Today's naptime project is just about one of the fastest ones I've tried out. I've been looking for fun and fast Easter/Mothers Day gifts, and I thought a sugar scrub would be a great gift. With some sugar, some hand soap, a jar, jute, a little pillow stuffing and some scrap burlap you have a great gift!


Subscribe to:
Posts (Atom)