background

Saturday, April 30, 2011

Naptime Project- Upcycled Button Up Shirt Laundry Bag


I saw this idea in a magazine recently, and had to try it out. We have a TON of old button up shirts that don't fit but are too cute to part with (although we do try to give our unworns once a month to Goodwill). This laundry bag takes under 10 minutes to make, and is easily hung in your closet or on a doorknob.

Besides being totally adorable, this bag is perfect for delicates (including stuffed animals) or travel- you can easily add a drawstring by folding the collar down to make a channel, and dump the whole thing in the wash!

First, take an old shirt, and lay flat on the floor. Cut off the sleeves, and then  from the top of the shirt, cut a straight line down the body to make the bag straight. If you are using a shirt with stripes, this is very easy- just follow the lines!


Turn the shirt inside out, and sew up both sides. Then sew the bottom. (just like a pillow)

Turn rightside out, and you're done! If you want this to be extra secure, you could sew the front (next to the buttons) together- however I left it so that I can open up the bag easier.

I used a baby clothes hanger, as adult sizes didn't work for this particular bag. This was a women's size L- a Men's XL should be wide enough to fit an adult hanger.


To add a drawstring:
-Run a cord through the top of the collar, pin collar (underneath cord, so there is room for cord to move) and topstitch 3/4" from top of collar.

Don't throw out the sleeves! We have some more ideas coming up!


Thirty Hand Made Days

Thursday, April 28, 2011

Quick and Easy Dinner- Shrimp and Grits (with bacon)

Full disclosure: this recipe is not a weight watchers compatible recipe. Sure, shrimp is healthy, and grits aren't bad either, but adding bacon and a ton of cheese doesn't help the waistline! Also, as someone who was raised in Colorado and southern California (whose grandparents are yankees and dakotans), I do not pretend to be an expert on grits so please don't compare mine to your grandma's old southern recipe :) !

You'll need:

-Quick Grits or organic grits, cooked according to the package directions
-1/2 pound shredded sharp cheddar cheese (more or less to taste)
-dash of milk or cream
-1/2 pound shrimp
-3 slices bacon, cooked slowly until crispy, then crumbled (optional)
-Garlic or garlic powder, and paprika, depending on your preference or what you have on hand

If you have some leftover bacon, this is a one-pot meal, which is perfect for me on a hectic weekday! Total cooking and prep time is under 15 minutes.

Start by cooking grits to the packages directions. The quick grits I used said to place in boiling water, reduce heat to medium-low, and simmer for 5 minutes. After the grits started to thicken up, I added the cheese, crumbled bacon, garlic (although I think garlic powder works best for such a quick recipe in retrospect) and about a tablespoon and a half of smoked spanish paprika (we love paprika here- it can be easily lost in a rich dish like this so I added quite a bit. It helps balance the cheese's flavor). My grits got a little too thick (I like them pretty creamy) so I added a bit of milk to thin them out.


When the grits were almost done, I tossed in the uncooked shrimp. I let them cook for two minutes on the heat, and then took the pan off the heat to cool a bit. The shrimp continue to cook in the piping hot grits- so to avoid overcooked shrimp, either sautee them in the bacon grease (yum) and add them to the top of the grits at the end, or add them into your grits almost before serving. Shrimp should be opaque and pink, not grey, but should not cook very long after the whole body appears pink, or it will be rubbery and sometimes will taste fishy.


Wednesday, April 27, 2011

Naptime Project- Blue Jean Pocket From Grandma C


This adorable (and super quick) project is thanks to my mom, Chris (the other half of Sweet C's whose fabulous original paintings can be found in my Etsy shop ). 


If you have an old pair blue jeans laying around you can make a cute little Blue Jean Pocket Pouch for your little ones.  


First, when you cut the pocket off, you will note that the back of the pocket is the inside of the jean.  You can leave it as it is, or for a more finished look, you can cut off the back and use the pocket as a pattern to cut out a piece of jean to use as the back of the pocket.  


With wrong sides together, stitch around the pocket on three sides leaving the top open. 


I added a jute handle and cute buttons I found in my local craft store to embellish the front of the pocket.  You could leave the front plain, add a patch, a flower, or write your child's name with paint pens.  


You could also place a heavy magnet inside and attach the pocket to your refrigerator! These pouches make great storage for crayons, toys, chore cards, and more!

Tuesday, April 26, 2011

Hey, at least the baby and husband are fed!

With the chaos of Easter, and a blessedly high number of wedding orders in my Etsy shop, the posting kind of fell under the laundry pile the last two days. I promise there are some CUTE, CUTE, CUTE projects coming your way this week!

In the meantime, a few pictures of the little man taking in his first Easter- I'm pretty sure his Grandpa (hub's dad) enjoyed hanging out with him more since he is now working on cutting tooth #2. His teething routine seems to be a few days of misery or just plain sluggishness. Here is your warning, bright colored eggs- you have one more year to hide from this little rascal!


Monday, April 25, 2011

Farmers Market Season Sale!

I am seriously excited about farmers market season. I love walking up and down the aisles, staring a fresh produce, wonderful art, delicious cheeses, breads and of course, in Colorado- awesome tamales!!!!... I just can't wait!

To help get you in the farmers market mood, all of my farmers market bags are ON SALE this week! Check out my shop to find some awesome bags that will carry around your finds in style.

Sunday, April 24, 2011

Easter Sunday Strata


This Easter Sunday we held a small brunch with my in-laws as a great celebration and way to break our Lenten fast. Since we haven't been eating eggs, dairy, or meat for 40 days (I got a pass as I am nursing) we were eager to tear into some delicious food.

Stratas are one of my favorite things to make for brunches. All of the preparation is done the night before- they just have to cook for one hour the morning you will be serving it. It is eggy, cheesy and decadent- and always gets me TONS of compliments, without much fuss!

Friday, April 22, 2011

Quick Easter Decoration- Christ is Risen! Subway Art

If you are like me this year, you are totally behind on your Easter decorations. I made this great subway art you can print and frame for a quick and beautiful Pascha (Easter) decoration!

Pascha, or Easter Sunday for the Orthodox, is a fabulous celebration in our church (my husband and I are Orthodox Christians, and we attend a Greek Orthodox Church). Saturday night we host a candlelight Resurrection midnight service that is truly moving, and I am pretty sad I won't be attending this year as Little Man is just too little to tolerate a church service from 11pm-3am! Sometime after midnight, our candles are lit, the church bells ring, and the whole church erupts into song- it's incredibly beautiful and moving.

After the service, the Lenten fast is over- and a bunch of hungry worshipers head to the fellowship hall (or straight home) to feast on the dairy and meat products they have abstained from for the last 40 days (I have had a pass the last two years from full fasting as I was pregnant and nursing). Everyone is joyous- they kiss each others cheeks, share wine and food, and loudly proclaim "Christ is Risen!" to which the person they are greeting will reply "Truly He is Risen!" (in the original greek: "Khristós Anésti!" "Alithós Anésti!")

The Orthodox church isn't only Greek- and neither is this wonderful proclamation. Until Pentecost, the joyous celebration continues in every language. As a newcomer to the Orthodox festivities, I find this part very challenging- because I don't speak anything but English (and Spanglish). I used a list I found online to create this great subway art of numerous translations of "Christ is Risen!" including Russian, Croatian, Georgian, Celtic, Turkish, Coptic, Spanish, French... and many more. These are spelled in the most phonetic way possible for many of the languages, so you might know of different ways to spell them (for instance the Greek could also be "Christos Anesti").

Feel free to download this and print it for your home this Pascha!

If you'd like a higher resolution PDF copy please email me at sweetcsdesigns (at) gmail (dot) com!


Tuesday, April 19, 2011

Taking Better Photos- Why You Need Photo Editing Software

 This isn't from iPhoto's black and white setting...

I am constantly trying to learn all that I can about taking better photos and making the ones I'm stuck with more interesting. While I can't change everything, and I can't come anywhere near being an expert, I'd love to share some tips I have come across that have helped me morph my stale boring shots into interesting subjects.

Craftroom Makeover- Super Cute (and easy) "honey do" chalkboard


Chalkboards are sooo in right now- and I have gone chalk paint crazy! I am (eventually) going to debut a bunch of chalk goods to my wedding line in my Etsy shop, but I had to share this awesome little craft with everyone. 

Just like every mom I know, I count on my wonderful, awesome, amazing hubby to help me get anything done (it doesnt hurt to butter them up before you ask them to haul trash, right?). I am a very verbal person, and my husband doesn't always (ok hardly ever) listen to what I say. His mantra is always "write a list, write a list"- but I am usually too all over the place to sit down and write out a list. I decided to make a cute little whiteboard to write out his "lists" while I'm sitting in my craftroom. I can look at the list and figure out what I forgot, what I need that day, and what I'm saving for the weekend. I can take a picture with my phone, text it to him, and I'm done! Might not work for you, but it's just my style! 

Easy Recipes For Busy Weekdays- Turkey Burgers and Caramelized Onions

I'm submitting facebook posts on the Stay At Home Moms of Etsy Facebook Page all week, and on Tuesdays they share easy recipes for busy weekdays. I had to share this one with the fabulous mamas! This one is courtesy of Jenny Flake of Picky Palate (if you haven't seen her blog, you need to bookmark it ASAP and be ready to droooool over her fun recipes and amazing photography).

Before I get to her recipe, I'd like to add a recipe for a quick and easy little topping for sliders my husband and I can't live without. One of his good friends makes these amazing caramelized onions at tailgates for burgers, breakfast burritos, everything! (After tasting these onions, I know if any of you come to CSU football games you will be hunting us down).

Dave's Onions:
-1 onion
-1-2 tablespoons honey depending on taste
-4 tablespoons butter (it's ok if you're eating it on turkey burgers, right?)

Chop onion in half, then cut thin slices out of each side (I sometimes use a mandoline to slice the onion, which helps them caramelize much faster). Heat half of the butter in the pan (on medium heat), with a couple of turns of the pan of olive oil. Once pan is hot, place onions in and toss lightly to completely cover in olive oil and butter, reduce heat to medium-low, and let cook until slightly brown on one side.

Resist all temptations to "chase" the onions around the pan. Caramelizing onions is all about letting them sit and slowly turn a deep amber color. Once you feel you have a good browning, go ahead and stir the onions and add remaining butter so you can brown the rest. Do not let the onions burn- we are looking for caramel, not charcoal. I like to have a low heat so I can throw them in and forget about them while preparing other parts of the meal, and not have to worry about burning onions.

Once your onions are almost all caramelized, add 1-2 tablespoons honey (I like 2, my husband prefers them slightly less sweet). We will sometimes add an ounce of whiskey (or dry, dry wine) to deglaze the pan. This is entirely up to you- the heat will burn off the alcohol, but it might be too strong a taste for little mouths. Remove from heat and let rest while you finish your slider prep!

And now on to Pick'y Palate's wonderful Turkey Burgers:


Don't these little turkey burger sliders look FANTASTIC?! I love feta and sun dried tomatoes. Hubs and I will be wolfing these down after Easter, and the lenten fast is over, for sure!


Check out the recipe, with a bunch more beautiful photos here!

Feta Sun-Dried Tomato Turkey Burger Sliders
2 Tablespoons extra virgin olive oil
1 lb ground turkey
1/2 Cup crumbled feta cheese
1/4 Cup sun-dried tomatoes, jarred in olive oil
1/2 Cup fresh baby spinach leaves, chopped
Pinch of Kosher salt, fresh cracked pepper and Lawry’s Garlic Salt with Parsley
Sun-Dried Tomato Mayonnaise
1 Cup mayonnaise
2 Tablespoons sun-dried tomatoes, packed in olive oil, drained
Baby hamburger buns or dinner rolls, split and warmed
2 Cups fresh baby spinach leaves
1.  Heat oil into a large skillet over medium heat.  Place turkey, feta, sun dried tomato, spinach and seasonings into a mixing bowl.  Mix until just combined.  Form 1/4 Cup little patty’s and place onto a cookie sheet.  Once all are formed, place batches in hot skillet.  Cook for 3-4 minutes per side or until golden brown and cooked through.
2.  Place mayonnaise and tomatoes into a bowl; mix to combine.  Spread over insides of warm rolls.  Layer bottom roll with spinach and the burger.  Close with top roll and eat :)
Makes about 12 little sliders

Sunday, April 17, 2011

Taking Better Photos- Photo Editing

I have just recently started an affair. Sometimes its wonderful- sweet, reassuring and addictive; and sometimes its a harrowing, bitter mess. Who is my new suitor? Don't worry, it's my husband's DSLR camera. While we had a brief fling on our honeymoon in Scotland (a picture guide coming soon) we hadn't really connected until little man was born. And now that hubs has set me up with photoshop and adobe lightroom... well it's a full-blown romance. 

I am going to start compiling some tips on taking better pictures as I come across them. I'm still new to DSLR, and don't pretend to be an expert, but I am enjoying learning all about taking more interesting, clear photos. 

The problem? Camera equipment is expensive! We have an entry level DSLR (canon xsi, and we love it), a 20mm (wide angle)lens, a 50mm lens (my go-to, gives the blurry look beyond subjects), a 100mm zoom, and a canon kit lens. With photoshop and lightroom our photography bill is well over $1,500. So how can you get great results on a budget? Is it even possible? Of course! 

I found this wonderful post from Made in Lowell on how she transforms photos from a simple point and shoot camera. Yes, you will need photoshop and some working knowledge of it- but if you want great photos, you are going to need a photo editing software. Check out her wonderful tips here!!!!!!

Saturday, April 16, 2011

Naptime Project- Fire Dog Birthday Gift


One of our good friends son Marshall just turned four, and I didn't have a ton of time to search for a present, so I decided to whip up a fun wall hanging for his room. His birthday party is later today, and the invitation was an adorable scene with firetrucks, firefighters and fire dogs! I decided to go with the theme and make a cute little pup.

Supplies you will need:
-Paint
-Cricut Create a Critter Cartridge or pre-cut Dalmatian and firehat (foam or wood would work)
-Sure Cuts a Lot software or font cartridge or pre-cut letters you can trace onto cardstock and cut
-Canvas
-Staple Gun
-Ribbon, jute, or wall hanging wire
If using a cricut, you'll need the following cardstock:
-Red
-Black
-Yellow
-Fun print (I used the large polka dots from Nana's Kids Cardstack)
-Cricut Expression

Friday, April 15, 2011

Where Do I Start? The Basics!

I've always been "creative", but I haven't really tapped into my creative side since I was a kid. I may have painted walls at home, but that was about it. Since I've had a job, my mantra has been "if I have money, I can buy it. Why make it"? Since little man came along, I've changed all of that.

I bookmarked craft blogs. I drooled over Martha Stewart's ideas. I raided the supplies that had been left by my mother who I always put to work when she comes to visit. But I didn't really know where to start, and I was TOTALLY intimidated by all the craft blogs I found. I wanted to do all the things I saw them doing, but I 1) had no clue what they were talking about; or 2) didn't have the budget they seemed to have.

I decided to start this post because I've had a few people ask about my new found "craftiness" and ask not only how to organize, but what they need to get started. I couldn't seem to find this on other sites, so I thought I would start my own.

I always loved getting those "checklists" in girl scouts that laid out plainly what you were going to need, and what was a nice added perk. This first "where do i start" series post will be my own version of a crafting mama's checklist. I am going to list a few tips on not only what you might need, but where you can find it for a good price- what to splurge on, and tools for any budget. Once you've compiled your craft stash, check out my Pegboard Organizer for an awesome way to store it all.

Craftroom Makeover, Part Three- Containing Fabrics

Full disclosure: I'm not proposing anything dramatic here, people... so if you are looking for a groundbreaking post, this one isn't it. I'm hoping this will give you some good practical ideas to get organized WITHOUT spending any money.


Thursday, April 14, 2011

Recipe Roundup: Here's to Hazelnuts! (And Chocolate, Of Course)

When I was pregnant with Little Man, I craved Nutella something fierce (I was ready to divorce my husband when his mom used the rest of one of my Nutella jars for a party we were throwing... oh, hormones!). I ate Nutella almost every day- at least twice a day. Since then, I have backed off my cravings a bit, and have kind of neglected this wonderfully chocolatey treat.

Until this morning. I went Nutella crazy (and no, thankfully I am not pregnant again yet). For breakfast I whipped up some Nutella pancakes (which I devoured too fast to photograph) by just adding a healthy spoonful or two into pancake batter (if you make 1/4 a batch you can make two perfect pancakes when it is just you).

I may or may not have made a pancake sandwich with a little Nutella smeared in between two pancakes... which got me looking (and lusting over) some awesome recipes with my favorite treat. Here's to hazelnuts:


Nutella Crepes From Tidy Mom:


Nutella Stuffed Brioche French Toast from Nook & Pantry:


Gluten Free Nutella Brownies from Going Gluten Free:


Almond Macarons Filled With Nutella from Brown Eyed Baker:

The only way Nutella can be even better- Almond Paste! When two of my favorites collide....

Ok, now I need to wipe the drool off my keyboard... I can't wait to make some of these after Lent (when then hubs can join in the gorging!).

It's a Gray Day

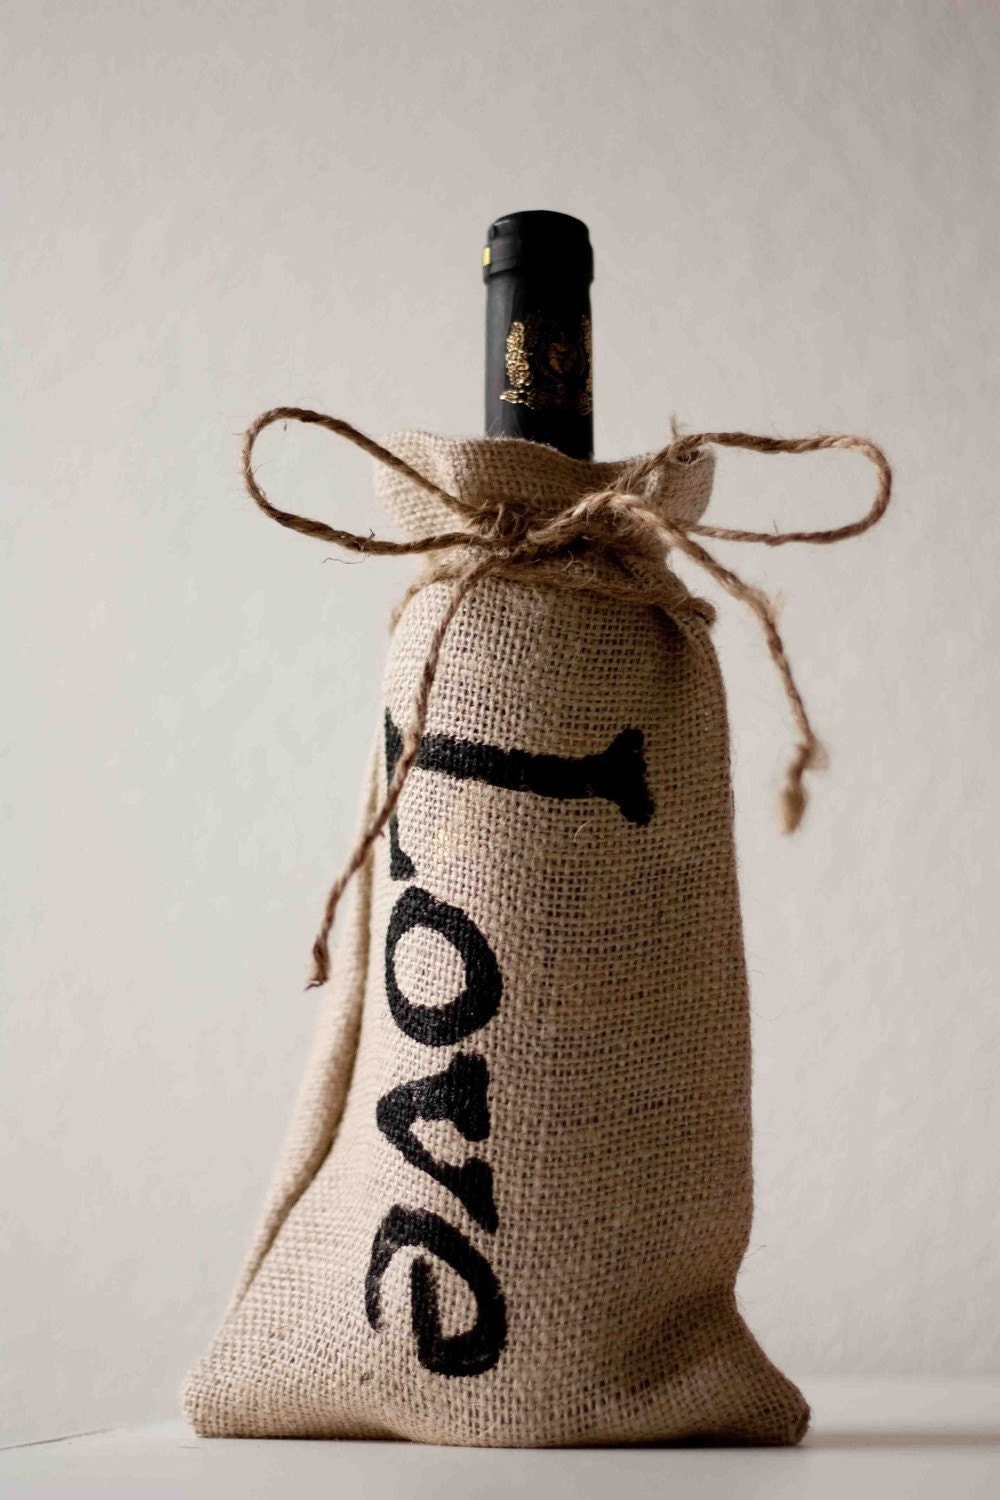
To match the day outside (it has stopped snowing and is now gray and drab) I made a new thank you bag on light burlap with a whole new fancy thanks font. A beautifully simple gift in this bag is sure to brighten any one's gray day!

You can find this little beauty here!

Wednesday, April 13, 2011

A little delay...

I have a lot of great projects I've been working on... but I've been a little behind since the baby is cutting his first teeth today. He's been a little cranky and in need of lots of extra love the last few days. When he's back to his mischievous self I have some really special treats!

Tuesday, April 12, 2011

Fun Learning Tools For Your Little One!

I just had to share a link with everyone to my friend Alison's blog Oopsey Daisy.

Through the magical powers of Facebook (and a recent high school reunion), many friends from my high school have had the wonderful opportunity to reconnect and share in each other's new lives. I've really enjoyed seeing what Alison, in particular, has been doing since the birth of her adorable son with her outstanding blog. In fact, her blog was one of the sites I most admired when deciding I too was going to embark on a crazy trip down the inter-tubes (extra points if you know that political reference).

Outside of some inspiring craft ideas, one of the most amazing features of Alison's blog is her "Mommy School" series. If you have a little one who you are excited to foster a fun learning environment with, you need to check out her packets!

Her newest "Mommy School" packet is titled "E is for Easter"- go download it and use it with your little ones at home before Easter is here!

Naptime Project- Super Easy Sugar Scrub Gift

Today's naptime project is just about one of the fastest ones I've tried out. I've been looking for fun and fast Easter/Mothers Day gifts, and I thought a sugar scrub would be a great gift. With some sugar, some hand soap, a jar, jute, a little pillow stuffing and some scrap burlap you have a great gift!


Monday, April 11, 2011

Giveaway Winner!

A big thank you to those that signed up and followed the blog this last week. Building this blog has been a labor of love for me, and along with an Etsy store in it's infancy, I am finding out what works and what doesn't while managing my new "work" and an 8 month old little guy.

It can be a challenge, but I love to share fun ideas, and the the input I have recieved so far has been humbling and such an amazing honor.

With all sappiness aside, its time to announce my first ever blog giveaway winner... congrats to Ellie Fitzpatrick! Ellie, please email me at sweetcsdesigns (at) goole (dot) com with your address and bottle bag style ("Love", "thanks", or "hugs").

Ellie happens to have a fabulous Etsy store full of baby knits. If you'd like to check them out, please do so!

If you didn't win, don't worry, I am giving away more bottle bags until the craftroom makeover is done. Each day this week, post on either a blog page or my facebook site and sign up to either follow the blog or "like" the site! The more posts, the more chances you have to win!

Saturday, April 9, 2011

Craft Room Makeover , Part Three- Pegboard Organizer.

This post will be the last post you can comment on to enter this weeks bottle bag giveaway! Please comment and "follow" the blog or Sweet C's on facebook to enter- and look for new chances next week!!! 


I have a lot of stuff. I have pens, glue sticks, cricut tools, scissors, hole punches, bobbins, pins, thread, eyelets, grommets- a. lot. of. stuff.

Before I started my reorganizing, I had a chaotic system- I could find everything, but it took a few minutes. Now that my little guy is starting to stand, I know walking isn't far off- and I wasn't really comfortable with having things that could be dangerous on a table top, either. He can't reach the table yet, but he seems to be growing so fast, now seemed like just as good a time as any to get things where he certainly can't reach them.

I had a pegboard sitting around that we weren't using anymore. We had used it in little mans crib underneath his mattress for our angel care monitor (something I swore I'd never buy, but after my poor husband was so worried in the hospital that something would happen to his little guy, I figured it was a small enough investment to make us feel more comfortable).

I first picked out a wall color. I knew I wanted to paint my wall before I hung up my pegboard so I wouldn't have to take it down to paint it. I had picked out a very lively color scheme that I actually took off a bottle of Anchor Steam Beer- a robins egg blue, red, and a buttery yellow. I painted the wall the blue and spray painted the pegboard red. I hung everything up, and while I loved the colors, I thought it just didn't "go" with out house. It also didn't go with any of my furniture in the room, the curtains, or my previous projects. I can be impulsive sometimes- which is why I am very glad I bought small cans of paint and had decided to do one wall at a time!
take one... just too bright

Wednesday, April 6, 2011

Craft Room Makeover- Giveaway Details!

This spring, I am working on fixing up my chaotic craft room. I'm also hoping to gather lots of organizational ideas and share some fun, easy crafts for the busy women and moms out there.

To help me clear out some clutter, I will be giving away one of my signature bottle bags every week of the craft room's renovation. These are wonderful hostess gifts- they fit all kinds of cooking oils, wine, sparkling cider, and more! Best of all, the winners will get to pick their design!

At the end of the makeover, I will be holding a final drawing for a soon to be announced prize. So how can you win? Comment on the "Craft Room Makeover" series blog posts and follow the blog. One winner will be chosen every week. For an extra opportunity, comment on the Sweet C's Design Facebook page and "like" us here.

Naptime Project- Adorable "Play Ball" Banner!


Our family could not be happier that baseball season is finally here. To celebrate, I wanted to add some more baseball decorations to Little Man's room. He already has a ton of baseball stuff, but I've been looking to do some fun designs over his crib. I thought this banner would be a lot of fun in his room, and I'm including a downloadable file you can use to make your own banner!  

Check it out after the jump!

We Did It Wednesday! Share the link love!

Craft Room Makeover Part 2- Shabby Chic Whiteboard (more giveaway entry opportunities!!)

Having an Etsy shop has helped to propel my descent into chaos. Keeping my planned tasks in line is sometimes a complicated ordeal, as organization isn't always my default setting. Knowing where I am with certain projects and where I need to be with others, keeping up with ordering materials, and keeping myself motivated can sometimes get tricky.

Tuesday, April 5, 2011

Little Man's Favorite New "Recipes"

"no more peas, please"!!

So far, we've been blessed with a baby who isn't too picky. Outside of his hatred for peas (even when blended with his favorites) he's pretty much down for anything mushy. I am trying to make most of his food with whole foods, and buy organic whenever I can (though to be honest, for myself I rarely buy organic). While baby food is very easy to make, I know a lot of people don't think they have the time to do it. I've found if you make big batches, it's totally easy, much cheaper, and I know it is healthier than processed foods. I feel guilty even calling these "recipes" since it's really just about combining, a quick steam, and blending.

Craft Room Makeover, Part One- Ribbon Tree (And upcoming giveaway!!!!)

My craft room is an utter disaster. I am too embarrassed to reveal the full extent of the destruction that has become hurricane Courtney's Crafts, so I am going to slowly add my remedies one by one, until the project is complete later this spring (or summer). I am going to post details on an awesome giveaway very soon that will be tied into this organizational series. To be entered, sign up to follow and then comment on this blog or my facebook page (more comments, more chances to win!) with some of your favorite organizational tips.

I'm going to start with one of the smallest problems, but one that annoys me more than anything: unruly ribbons. I have two plastic tubs full of ribbons, and countless extra odd cuts of ribbon floating around all over. I was thinking of buying a ribbon organizer, or making one in my plastic rolling drawers, but I really wanted a way to display them so I don't forget about them- and I wanted something free or under $2. I first thought of putting nails in a board and hanging ribbon spools up high, but it just looked tacky. While not the most refined idea ever, I thought a ribbon tree might be more fun and appropriate. It's vertical, so it doesn't take up much precious desk space, and it gets all of my ribbons organized and visible. It also used up some of my scrap cardstock :).


Monday, April 4, 2011

Made By You Monday Blog Hop!


Introducing the "Double Agent"


Since my little man was born, I have been less than enthusiastic about my wardrobe. Things don't fit right, things don't look like they used to- I am just totally uninspired. I've never really considered myself fashionable- I prefer flip flops to stilettos, and I am most happy in a tee shirt, hoodie, and jeans. I have, however, always been a big hoarder of purses, bags, handbags. With only one income now, my accessory indulgence has taken a sharp detour- that is, until I came up with this awesome little bag!

I think every mom is a bit of a "double agent" and let's face it, we have a few personalities. This bag is perfect for the woman on the go who wants to change things up on the fly, wants some fun summer colors, but needs something sturdy and practical.

Worn one way, this bag is stylish and slinky as a wonderful handbag, with plenty of room for your wallet, sunglasses and all of your essentials.

Simply turn the bag inside out, and you now have a wonderful, roomy tote, with a whole new design! Tote around your library books, picnic supplies, toys, or even use as a shopping bag, and you can carry all of your finds in style!

Measuring 11"x15" with a 7"x12" handle, this little gem has plenty of room for everything you need. Heavy outdoor canvas gives plenty of strength, and comes in wonderful, colorful designs that are perfect for summer. And like everything I make, this can come in custom colors and fabrics so that you can find the perfect bag for your wardrobe!

You can find this new style here.

Sunday, April 3, 2011

Just had to share...

I've been busy editing some recent pictures of the little man tonight, and had to share some adorable pics we took recently. Can't believe he's already 8 months old!


Have a great Sunday night!